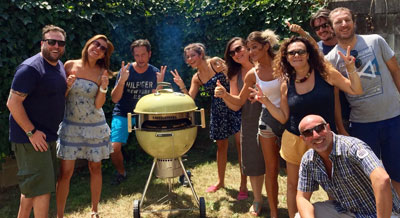
A guest post by Ann Peavey, aka @SeattleMaven. The post originally appeared here.
Quietly it lay buried in the advertising pages in the way-back of the October Sunset magazine comfortably-snuggled somewhere between the Incinolet and redwood hot tubs. The simple advertisement for the KettlePizza converter drew me in like moth to flame: The idea of turning my Weber kettle-grill into a Neapolitan pizza oven. Two weeks later came the familiar baying of the hounds as UPS’s man-in-brown dropped an enormous box off on my doorstep – holding within it the key to my satisfying, homemade pizza future.


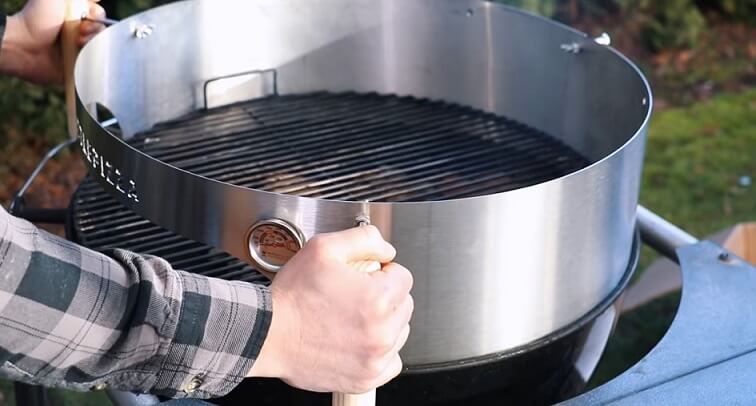
An abundance of options are available through the fab folks at KettlePizza: The BASIC CONVERSION KIT simply uses charcoal briquettes and their sturdy 14″ pizza pan along with a unique converter – (this appears ideal for tailgating); the DELUXE KIT which includes a round 15″, 1/2″ thick cordierite pizza stone and wooden peel with the conversion kit; the PROGRATE TOMBSTONE COMBO KIT which is a step-up with a durable stainless-steel grate, extra-thick tombstone-shaped cordierite pizza stone (which heats up to 1000 degrees), and an aluminum peel (with built-in bottle opener); or the Taj Majal of options – the SERIOUS EATS SPECIAL EDITION – with an an add-on Baking Steel insert that heats the heck out of the upper ceiling of the kettle dome and allows for hotter temps and uber-quick blistering of pizza toppings (and I just noticed they’re on sale, too!). I opted for the Prograte Tombstone Combo kit – affordably priced, and able to quickly produce a pizza that’ll stand up to some of the best I’ve had!


Sure you’ve heard me rave about how Baking Steel changed my life (and it did!) – literally bringing my oven to the Nirvana-level of pizza baking. But this crazy KettlePizza add-on for my Weber grill? It’s literally the next best thing to having your own wood-fired pizza oven (but without the thousand-dollar pricetag). Instead of the 550-degree temperature cap on my Wolf oven, the KettlePizza peaks at temperatures exceeding 700-degrees. I was initially a little apprehensive as I began the assembly process – fully expecting a morning of fist-shaking and cursing missing parts and assuming Twister-like positions. Unexpectedly, within the first 10 minutes the wood handles had been attached, the grate installed, and my Weber was magically transformed. Now it was time to get down to business!
You’ve undoubtedly seen my blog post on the perfect pizza dough. With the beautiful blistering and bubbling this dough-making process achieves, you can imagine my anticipation in seeing how it’d react in the confines of an ultra-hot KettlePizza oven. I began the process by piling a hefty supply of hardwood-chunk coals in the far back reaches of my barbecue (most easily done before the grate is placed on the barbecue). Once ignited, I added two 2″-3″ diameter split hardwood pieces atop the coals to push the temperature up a notch. I was not disappointed: The temperatures quickly rose from 550 to 675 and was ready for pie! The key is keeping a steady, but low flame towards the rear of the kettle.

Then began the actual cooking process – deftly flinging my first pie off it’s wooden peel and onto the heated tombstone-shaped stone and watching as it quickly puffed, crisped and bubbled atop its blistering-hot bed. After about two minutes had passed, I carefully slipped the long-handled aluminum peel between pizza and stone to check the crispness of the crust’s bottom. Every 30-45 seconds, I turned the pizza a full 90 degrees to allow for consistent cooking. After approximately five minutes, I could see it was time to give the top a last bit of crisping to create the telltale charring that’s traditional on Neapolitan-style pizzas. Moving the pizza off the stone and gently guiding it up towards the super-heated top of the Weber’s dome did just the trick and in less than a minute it was time to enjoy the fruit of my labor.


Of course the key to fabulous pizza is the ultra-thin crust that’s best achieved with delicious dough and slow knuckle-work. A quick dusting of your peel with a fine grained semolina will help it gracefully transition from peel to stone. Fig and garlic, andouille and jalapeno, traditional pepperoni and cheese, margherita with fresh mozzarella and basil all came out with equal success over a course of an hour. Halfway through the process I stoked the fire with 3″-4″ hardwood chunks to keep a steady flame in the back and was pleased to see within just a matter of minutes temperatures quickly raised 100-125 degrees into the 700-degree range.


My take on this conversion kit? Definitely go with something in the mid-range. Although I didn’t try the basic kit, I suspect it’s likely the perfect selection for the novice pizza maker or die-hard tailgater. Because of the small size and portability factor, you’d likely be the most popular person at a tailgate! For me? The Tombstone kit offered everything I need – the longer handle on the aluminum peel made it quick and easy to manipulate the pie into the hottest parts of the kettle to achieve a spectacular end result. The icing on the cake? It’s built in the USA!